How to make Digital art: A tool of unending possibilities.
Posted on: 14 June 2022 by Michael White, VG&M Visitor Services in 2022
For Museum Week, I was asked to write a blog on the creation of digital art for the Victoria Gallery and Museum, as I have previously created various artworks for them. I am happy to use this opportunity to write something that would be of some worth to people wishing to learn more about the thought processes in the creation of digital artwork. All images within this blog will be my own and specifically digital art pieces. And I’ll be pointing you to places you can go to learn more.
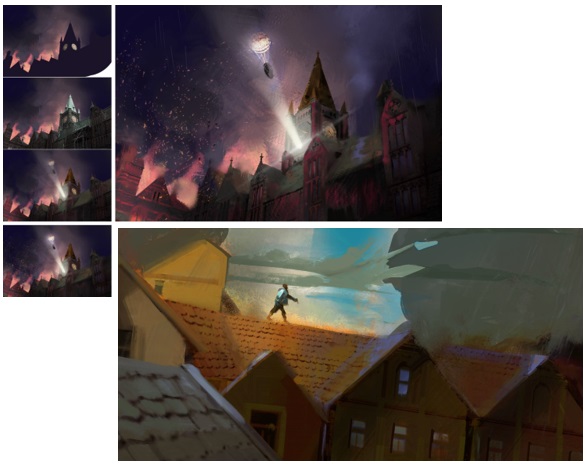
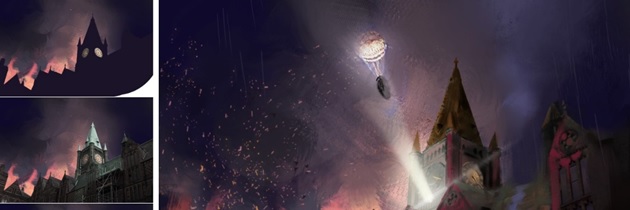
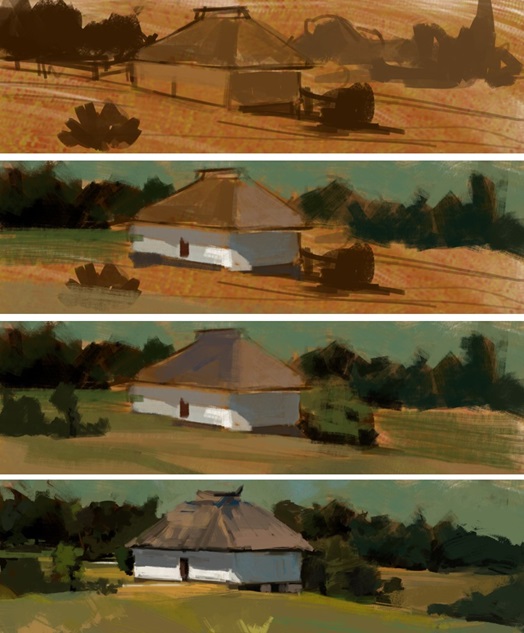
Pictured above is one of the images created for the VGM blog, and underneath is an older image that informed and helped me create the first. Both use photo-bashing to give texture to things like roof shingles. And the layer composition is very similar.
Introduction
Digital art is not a ‘movement’ of art. It is simply the medium in which an artist chooses to use; a tool that can have an astounding capacity to create works of art and with surprisingly quick results. It’s no wonder that all aspects of the ‘art industry’ (illustrators, conceptual artists, advertising and so on) have quickly adapted to the power of this new medium. The truth is that with digital art you can emulate every other medium with frightening accuracy, if you’re willing to put the time into learning how. Without buying paint, canvas or brushes you can study art unendingly- simply with an internet connection and access to Photoshop or other software such as Krita or Corel painter. However, the truth is that, without knowledge of traditional techniques you’re without the foundation to emulate the artists you admire.
There is no shortcut to being good at it, my art teacher used to beat into me the pop fact “it takes 10,000 hours to become a master at anything”. Draw, paint and sketch in any capacity even if in doing so you find 100 more things you have to learn how to do. If it’s hard, compartmentalise and break down the things you’re finding tricky. It’s layers upon layers of knowledge which you stand upon in any discipline and it’s certainly true of representational art.
Thanks to the internet you can find unbelievable videos of artists at work, complete with their own running commentary on their thought processes, even whilst they are making each brushstroke. Often digital artists working in industry offer video tutorials via Gumroad who’s £10 price tag is worth more than months at university. I’ll be mentioning the names of various great artists throughout this blog.
Beginnings- Thumbnailing
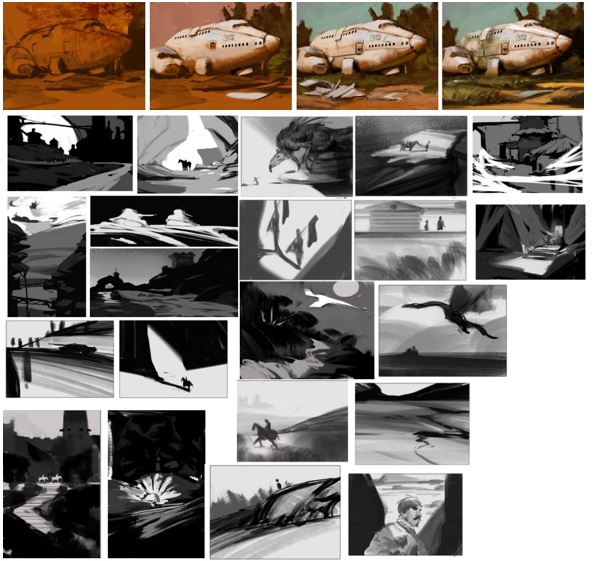
Pictured above are examples of Thumbnail compositions and how they translate into more ‘polished’ works. I’m not afraid to admit that most of these are rather unworkable and poor. But you must produce these stinkers as you get your abstract ideas out.
The beginning of any painting or drawing, that attempts to illustrate an idea or to tell a story is in your imagination. And in order to translate your ideas into a two-dimensional
image you must be willing to do crude and unfinished sketches. These are called thumbnail sketches because of their small size. I find it best to work in a ‘graphic style’ at this moment. Others artists much my better such as James Jean find it easier to work with pencil sketches that don’t encompass much more than the values of pencil and paper and instead simply work with line. I mostly follow the teachings of John Park’s and others Gumroad tutorials on dynamic composition, but there are countless others I can think of and look at for inspiration with thumbnails, Nathan Fowkes or Zac Retz being two that produce wonderful colour key thumbnails. Working graphically, breaking up the entire value range into 3 simple values simplifies the entire process and allows you to think clearly purely on the aesthetic and informational value of the compositions. I’ll happily point you to Eytan Zana’s Gumroad on dynamic compositions for this.
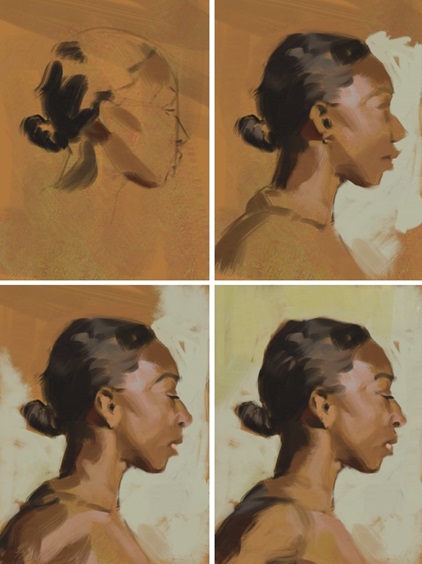
Above is an example of a practice portrait I enjoyed because the idea was worthy enough to continue within the first few stages. The idea being the simple way the light described the volume of the face and the hue change it created.
Steve Huston’s often repeated phrase “simple yet characteristic” is one that I find I’m often repeating in my thought processes throughout. “Let your viewers first see what you are trying to express -hit them with your message- then let them notice how you expressed it” (Richard Schmid- Alla Prima Everything I Know About Painting)
The Middle- Rendering it out
The mentally hard part is done with your ideas down in a readable format. Now you get to choose from the thumbnails you’ve done and start to render them out into full images. To do so there are innumerable methods and ‘styles’ to research and carry out. The power of digital technology means that you can emulate oil, watercolour, acrylic, gouache and so on- all at the same time. But to ground yourself in the traditional techniques is incredibly important. I would heartily recommend getting some traditional experience under your belt (if not just for fun) so that you can understand the conventions of art, without the unlimited freedom that you’re offered working digitally.

This was an example of a thumbnail I enjoyed enough to just get it “done” within 3 hours. I find if you want simple ‘good enough’ images, we like to see images that play with gradients, and in turn of contrast. Hue changes, value gradients, differences in texture that sort of thing- get these elements and suddenly everything feels more believable and less stale. Once we get what we want from a painting (subjectively) we don’t care how long the artist took.
Nick Grindaux’s Gumroad tutorials on painting are great at simplifying painting, using the same techniques of traditional oil painters painting wet on wet in order to build up simple values.
With digital painting, the infinite number of pixels and ability to zoom in forever can be even more daunting than the sheer white blankness of the canvas. A canvas can be of quite literally infinite pixels, and unless you’re wrangling and wrestling aptly with the medium, you have less of a chance of creating something you enjoy. Simplify the process.
Above is an incredibly old image, during my experience in originally learning from those I mention in this blog. It’s illustrative of just how you can compartmentalise and simplify in order to come up with a final image.
It’s important to work broadly, even at this middling stage. Use large brushes (mirroring the size of brushes compared to traditional canvases) and use smaller more intricate brushes within the focal point of your composition. Nothing is worse than a busy image that demands your eye’s attention across the entire width, and our eyes are inherently drawn to detail. If you look at the magnificence of a John Singer Sargeant painting -particularly the unfinished pieces- you’ll see how simply he renders objects out of our focus. John Park’s Gumroad goes into detail about this, I can’t recommend him enough, when it comes to getting started with the process of rendering your images.
“Photobashing” is the term used to describe the use of photographic imagery within your artworks and is increasingly becoming the norm with artists in industry, it’s best used simply to quickly get the general impression of the image and never to finish it. I find it best to use it as a base in order to paint on top of.
The practice sparks huge debates on art forums as to the validity of the artist’s integrity when they use photographs to quickly create and finish artwork. They worry if it’s not akin to tracing another artists work (an incredibly disapproved of practice that ends in people losing all credibility and their job prospects) but their anxiety about the practice is entirely unfounded. I must admit I was slow to come around to the idea of photobashing and I saw it in much the same way but the truth of it is that it’s simply a quick method of creating colours and textures. Again, there are only tools in this business and even tracing is a tool (but it will become a crutch that hinders you in every way).
The background for this is a photograph -of some paint.
A photo can create your composition for you, but it cannot give you the understanding necessary for repeatable results. Craig Mullins (often famed with the title “The Father of Digital Painting”) uses photography in much of his work, and I don’t think anyone on Earth is in a position to tell him he’s doing it wrong.
I would recommend (if time was infinite or if you’re simply painting for fun and not for a job or some attempt to break into industry) not photobashing. As you learn much more from trying to paint it entirely without the use of photos.
Endings
The hardest part for any artist is the ending. “It often takes two to do a good painting – one to paint it, and another to rap the painter smartly with a hammer before he or she can ruin it”- Richard Schmid. Overworking and underworking are two terms that haunt any artist. There are stories of John Singer Sargeant throwing his hands up at his portrait commissions and proclaiming that they can’t be painted after weeks of work. His paintings may seem like each mark was done in a frenzy of brushes and energy but each stroke was planned and thought of deeply in terms of its impact on the viewer, and even he can be considered himself guilty of overworking.
It can be impossible to know when to stop. The only real way artists can waylay this problem is to be working on multiple projects at a time. To push around paint without a purpose is completely opposed to what painting is. Intense concentration leads to your best work, and each stroke should have a reason to be made. This may cause you to anxiously worry about each tiny brushstroke but really, it’s more of a simple philosophy as to how you should think about your actions as the painter.
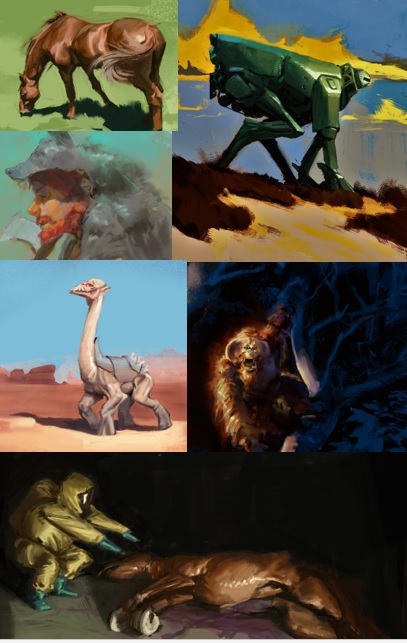
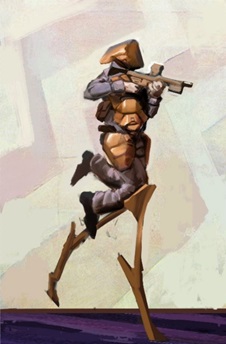
Examples of my digital artwork
Further information
Thank you for reading, and if there are any questions I can help with please contact me at:
Michael.white@liverpool.ac.uk
See more of my artwork on my Instagram account
Reading List:
Alla Prima- Everything I know about Painting By Richard Schmid
Figure drawing- Making every Mark Count By Steve Huston
Figure Drawing Design and Invention By Michael Hampton
John Park’s Gumroad Tutorials: John J. Park
Nick Grindaux’s Gumroad Tutorials
Eytan Zana’s Gumroad Tutorials
Keywords: Michael White, Digital Art, Museum Week, John Parks, Nathan Fowkes, Zac Retz, Eytan Zana, Steve Huston, Nick Grindaux, John Singer Sargeant .