Wish I was Here
Wish I Wish you were somewhere else? Create a fake holiday snap with PIXLR image editing software.
Step 1. Plan your scene
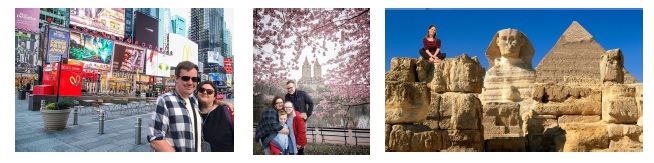
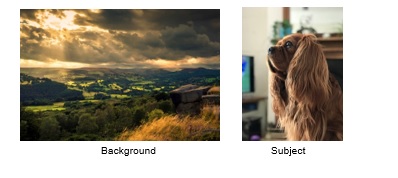
Decide where in the world you would like to be right now and find an image of that place. You can use one of your own snaps or find one online. This will be your background photo so try to avoid one with too many people and make sure there is space to put yourself in it. Here’s some examples.
You will also need a photo of yourself. You can use an existing photo but its better to take a new one
so you can pose in a way that suits the background. Think about the position of the light in your background photo and try to photograph yourself against similar colours.
Step 2. Image editing
Go to www.pixlr.com. PIXLR is a free online image editing tool and is a great way to get started with image editing. You don’t need to log-in or sign up.
There are two options in PIXLR:
PIXLR X (express) allows you to apply instant filters similar to Instagram.
PIXLR E (editor) this is more of a complete image editing software and you need to select this one for your project.
PIXLR X (express) allows you to apply instant filters similar to Instagram.
PIXLR E (editor) this is more of a complete image editing software and you need to select this one for your project.
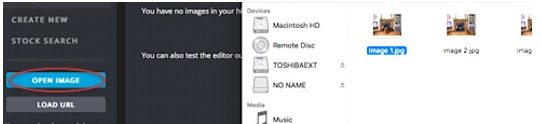
Next you need to open your images by selecting open image and choose the folder you saved your images in. Select your images and click open.
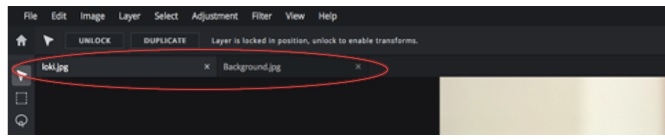
When your photos are open you can switch between them by selecting them on the bar at the top. Select the photo of yourself.
Use the Lasso tool from the tool bar on the left. This will allow you to select a small part of the photo by drawing around it with your mouse. Go to Edit - Copy then switch to your background photo and click Edit - Paste.

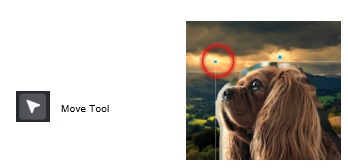
Now select the Move tool from the tool bar on the left and dragthe new photo into position. Resize your image by clicking and dragging the blue squares in the corner.
Once your subject is in position, select the Eraser tool from the tool bar on the left. This will allow you to remove the edges.
Use the zoom tool in the toolbar to view the subject close up, then select a smaller brush to tidy the edges.
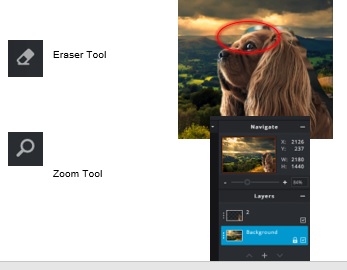
You now need to blend the two images to make it look more realistic. Select the background image from the layers panel on the right.
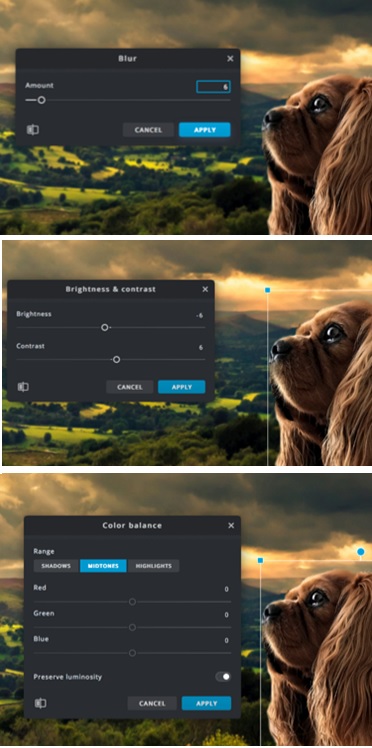
Go to Filter-Blur, and blur the background a little. This will make it look like it is more in the distance.
Now select the subject image from the layers panel on the right and go to Adjustment – Brightness & Contrast. Lighten or darken your image so it matches the background. You may also need to adjust the contrast.
Select Adjustment - Colour Balance. Experiment with the colour sliders until your subject photo blends with the background.
Once you have finished, go to File - Save and re-name you image before downloading it.